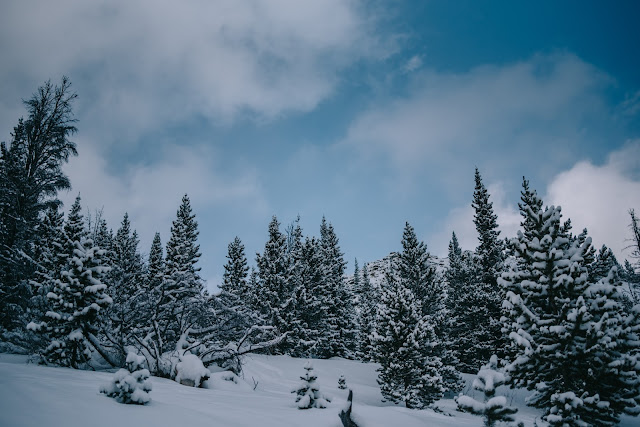
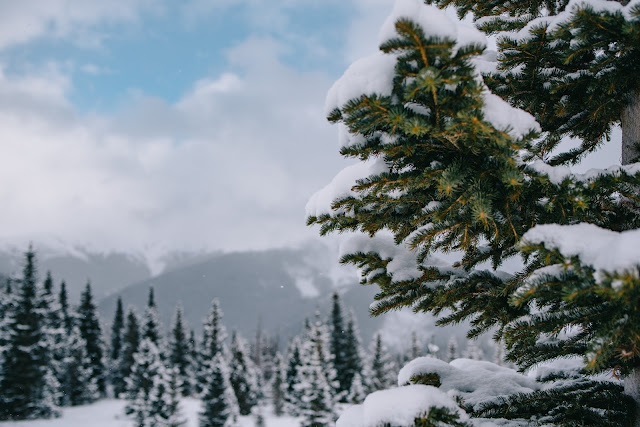
Being out in the winter, on days where snow is rapidly falling from the sky, or on days where the sun is bright and blinding, can be exciting AND challenging as a photographer! Typically the scene is so amazing that we want to capture ALL the glory to remember forever!
That being said, shooting in snowy conditions can be tricky!! Often times the pictures turn up super dark OR super blown out (over exposed) so you can't see anything but white!
I'm going to provide some tips for getting a picture you will be pleased with!!
WHICH CAMERA ARE YOU USING?
Dark and gloomy days may be good for even lighting, but your camera will still pick up the brightness of the snow and possibly underexpose the rest of the shot! (shot on iPhone)
A lot of what you need to do to shoot a beautiful picture in a snowy scene will depend on how much control you have over the settings on your camera! For example, this image was shot on an iPhone (6xplus). I needed to make some minor adjustments in exposure and maybe bump up the contrast, but that is about it.
When shooting with a cell phone, often times you can get really beautiful shots with very little adjustments! The technology has become so advanced that the automatic metering is often times spot on, perfectly exposing the entire image with very little need for adjustments, although it's not foolproof!
You are able however, on many of the newer model phones (both android and iPhone), to adjust your exposure before you even take the picture!
BRIGHT LIGHT OR OVERCAST?
OVERCAST LIGHTING...
Image 1:
Taken from the warmth of my car, this shot was taking on my DSLR and was shot using the AP mode.
Image 2:
When the scene has many differently lit areas, you have to decide what the purpose of your picture is. Is your goal to capture the person or the landscape? Sometimes you are forced to choose one or the other!
Image 3:
Lots of white will be challenging to counteract to get detail in the other surroundings.
Image 4:
You can't always perfectly expose every part of your scene.
In the images above you will notice that even though it was overcast, the snow still will serve as a bright reflector. You very much need to consider on what your goal is with the image, to determine how to best set your camera!
Image 1: My goal was to see the dense flakes falling from the sky. The mountains in the background are left a little underexposed because I wanted to ensure that the falling snow was visible.
Image 2: This image was tricky, I wanted to be sure to expose mostly for Chris, but also his surroundings. The juxtaposition of his small size coming through the row of trees was fantastic so I wanted to make sure the viewer could get the feel of all of this greatness! I exposed for the person (subsequently the trees were visible in detail) and then brought the highlights back down in post production so the detail in the snow was partially visible, although, that part was just based on my own desires aesthetically! We all know when looking at the picture, that snow was on the ground, therefore I don't really NEED to see all the detail, I just wanted SOME of the detail back in.
Image 3: This was one of my favorite images I shot that day for a bunch of reasons. As far as capturing my goal, I wanted to capture what I saw with my naked eye. I saw a vast mound of perfectly fallen snow, layers of hazy mountains, fog in the air and snow capped pines. I exposed for the mid range darks (think middle layer of mountain/trees), and knew it was ok to not see detail in the snow! This way I could get the full effect of the layers of mountains without making the back row of mountains disappear.
Image 4: My goal was Chris. I exposed for him, and didn't care about the rest. The trees and Chris were both beautifully exposed and we essentially have an overexposed section of snow and the snowflakes aren't super identifiable, which didn't change the impact of the image at all!
PARTIAL OR FULL SUN
Image 1:
Getting OUT of the full sun is often times the best way to deal with the tricky lighting! Here we had dappled light which can be pretty in person but can wreak havoc on the beauty of an image!
Image 2:
Shot with a GoPro, which will expose fairly well across all ranges as a point and shoot camera however I did have to give up some of the detail in the snow, which was irrelevant to what I wanted in the picture.
Image 3:
Details in the snow were absolutely stunning!
Image 4:
Rays of sun through the trees helped me light up my dark subject!
Image 5:
Full sun with a person....goal = person!
Image 6:
Full BRIGHT sun with lots of reflective snow!
Image 1: This is one of my least favorite conditions to shoot in because it never looks as amazing as it does in person! For this shot, I waited until my subject was almost in the shaded area, and then exposed for the shadows! I may have lost a little detail in his face but kept the overall look I wanted in the image.
Image 2: This was shot on a GoPro so I had no control over the exposures. I did have to bring up the exposure a bit in post processing since the person was the goal of the shot! Even though I lost detail in the snow but It wasn't important in the shot!
Image 3: I remember hiking up to this spot and being completely amazed at how the snow sparkled and shone! I had to get this memory captured!! My goal was the brightest part of the image, in full sun, so I exposed exclusively for this and let the rest go!
Image 4: In this image, the details in Chris's face would have been lost had I not moved him into the perfect spot to have his face illuminated! Either way, I would have achieved my goal for the image (the trees and the stream of sun coming through), but it was enhanced by this strategic position!
Image 5: Alex out in full BRIGHT mid day sun. My goal was him, let the snow be overexposed!
Image 6: I only cared about the scene! I wanted to see it all! The shadows are deep but all the snow, rocks and sky are clearly defined! I exposed for the snow/sky! If a person had been in here, they would have been darkish, however snow is a natural reflector so it would have helped brighten them up more so than if they had been on a grassy field with no reflections available!
SETTING THE CAMERA!
So all this talk about meter for this area or that area is all fine and dandy, but how do you pick how to set your camera?
There are actually a few options that I use, and based on my own trial and error, I have found what works best for me as far as speed of use and simplifying the process!
I typically shoot wide open, (low number aperture of 1.8-2, unless it lets too much light in), whereas other people who shoot landscape will always shoot at a minimum of 5.6. All personal preference and the style you like most!
MANUAL:
Setting your camera on manual is truly the ideal way to ensure that you will get your image exactly as you want it to be. I believe everyone who is serious about photography should learn how to use this setting, even if you don't use it a lot, you should know how to. You can set everything from your aperture, ISO and shutter speed to make sure metering is spot on! Manual metering is valuable if you have time to really dial in your preferences, and will become second nature after a while!
If you use Manual mode, you can set your meter for a certain lighting scenario and then leave it there until you move spots, or you can meter each image individually!
APERTURE PRIORTY:
This is the mode I shoot in, about 95% of the time. In this mode, you pick the aperture (and the ISO) and based on that, the camera selects the appropriate shutter speed. I have found, after testing out my camera in the AP mode and then switching to Manual and re-metering, I get almost exactly the same exposure/shot. That's the amazing thing about camera technology today, the internal meters FAR exceed the quality and specs that my first film cameras did when I HAD to use a handheld meter to properly expose an image! In super tricky lighting, I do switch to manual, but I am so comfortable with my camera that I know how to achieve most of what I want without switching back to manual! In addition, my main focus in photography is people so I don't always have time to switch around settings in manual, therefore Aperture and ISO are under my control.
As demonstrated below, these were all shot in aperture priority. I use my AE-L button frequently if in a situation like this where the sun was starting to come out, the sky wasn't flat grey. I didn't want to expose for the trees because then it would have washed out my sky. I wanted the sky to show so I used my AE-L button, exposed for the sky and then recomposed to get the image framed as I wanted.
Image 1:
The blue sky started to come through and the whole scenario changed on how I would take my picture!
Image 2
Image 3
This kind of lighting scenario is kind of cool because both my sky AND the snow showed a significant amount of detail! Since I had all the data in the underexposed parts of my image, I could pull that back in during editing!!
In all 3 images above, I metered the same way! AE-L, recomposed and shot!
When I am shooting portraits, it's a little different as sometimes you don't have time to meter and recompose. In that situation, I try to keep my subject in evenly lit shade or back lit if out in the open sun, because ultimately, the person is my goal and I need to ensure they are properly exposed!
Its is also good to remember that sometimes you HAVE to pick and choose when metering for an image, based on what is most important in your shot to give you the look you are going for. You can't always get a perfectly exposed scene in all areas, unless you shoot 2-3 images with different metering and layer them together in photoshop lol. I would say however for 99% of images you can get a beautiful image, with the areas of importance to YOU that look amazing!
I hope that this helps you a better understand how to get beautiful images straight out of your camera in snow/bright settings!!
If you have any questions, please feel free to post them below, or as always, reach out directly!! Taking shop is what I REALLY love and I love to hear YOUR experiences even more than I love sharing mine!!
If you are reading this from a location other than the blog, here is the link to check out more images and tip/tricks!
The Blog
You can reach out to me at suz@suzannelopezphotography.com


Comments
Post a Comment